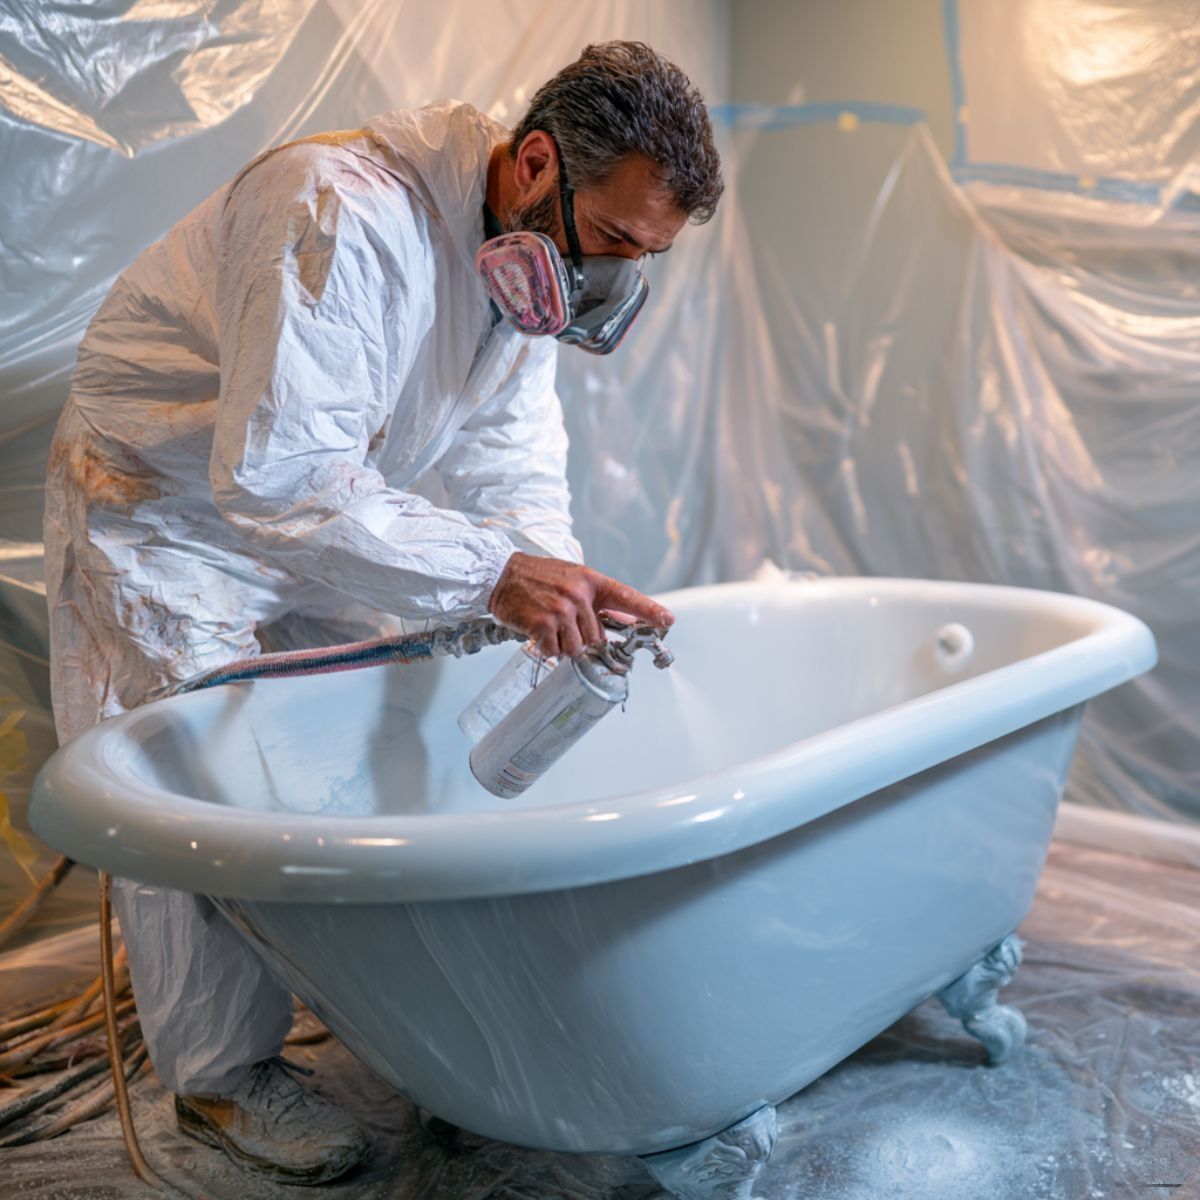
Properly Prepare Acrylic Showers & Tubs for Refinishing: A Pro’s Guide
Acrylic tubs and shower surrounds are common in modern residential and multifamily properties due to their low cost, light weight, and easy installation. However, acrylic substrates present unique challenges for professional refinishers, especially when compared to cast iron, porcelain, or ceramic tile. Acrylic is a non-porous, thermoplastic material that expands and flexes with temperature changes, and it often has a factory clear gel coat that creates adhesion barriers if improperly prepared.
This guide explains how professionals should prepare acrylic surfaces for refinishing, how to identify acrylic vs. fiberglass, which primers deliver the best bond, how to clean without surface damage, and how to avoid peels, blisters, fisheyes, and other common coating failures.
Understanding Acrylic as a Refinishing Substrate
Acrylic differs from ceramic, porcelain, and cast iron in three big ways that matter to refinishers:
- It flexes under load (especially near floor and drain areas)
- It melts, hazes, or crazes under strong solvents
- It retains factory coatings that resist abrasion and chemical bonding
Because of these characteristics, acrylic requires a balanced approach to surface profiling, cleaning, degreasing, priming, and temperature control before the first drop of coating is sprayed.
Step-by-Step Prep Process for Acrylic Tub & Shower Refinishing
Step 1: Identify the Substrate (Acrylic vs Fiberglass)
Before you start sanding or priming, confirm that the unit is actually acrylic. Professionals often use:
- Edge inspection: Acrylic tubs typically have a thinner material where the tile flange meets the wall.
- Flex test: Gently press the wall — acrylic flexes more than fiberglass.
- Backside color check: Fiberglass often has visible fibers on the back, while acrylic has a smooth, uniform back layer.
- Gloss level: Acrylic has a higher initial gloss and smoother surface than gel-coated fiberglass.
Getting the substrate wrong leads to incorrect prep methods and premature failure.
Step 2: Clean & Degrease Without Damaging the Surface
Acrylic has sensitivity to strong solvents that can haze or melt the surface. Avoid acetone, lacquer thinner, strong reducers, or harsh caustics.
Instead, professionals tend to use mild alkaline or water-based degreasers followed by a clean-water rinse.
Focus on:
- Body oils
- Soaps and shampoos
- Silicone residue
- Conditioner overspray
- Hard water minerals
Silicone contamination near corners, seams, and soap dishes is the #1 source of fisheyes on acrylic refinishing jobs. Remove silicone completely with plastic razor tools or peeling techniques before sanding.
Step 3: Sand for Mechanical Adhesion
Unlike porcelain or ceramic, acrylic should not be acid-etched. The correct method for adhesion is controlled sanding.
Recommended approach:
- Use 220–320 grit sandpaper for general scuffing
- Use 320 grit for tight corners and vertical walls
- Sand in straight crosshatch patterns for consistent tooth
- Vacuum and tack-cloth away dust after sanding
Avoid aggressive sanding (80–120 grit) because it can cut through the gelcoat, distort the pattern, or leave gouges that telegraph through the topcoat.
Step 4: Remove Failing Coatings (If Re-refinishing)
If the unit has already been refinished before and is peeling or flaking, stripping is required.
For this, professionals use Zen-Strip, a fast-action industrial strength refinishing stripper formulated for bathroom coatings. Stripping before resurfacing reduces:
- Delamination risk
- Peeling around drains
- Blistering from trapped material
- Adhesion failure on flex zones
Once stripped, rinse, dry, and perform your sanding steps as outlined above.
Step 5: Prime With a Bonding Primer Rated for Acrylic
After sanding and cleaning, apply a bonding primer that can handle non-porous thermoplastic substrates.
Professional refinishing shops have had long-term success with Prime-X, a durable epoxy-based bonding primer for slick surfaces including acrylic and fiberglass.
Why primers matter on acrylic:
- Acrylic expands with temperature (showers can fluctuate from 70°F to 110°F)
- Primers absorb substrate movement better than direct topcoats
- Epoxy primers provide a stronger chemical anchor than urethane alone
Allow proper flash & dry times as recommended by the manufacturer and adjust based on:
- Temperature
- Relative humidity
- Airflow in the bathroom
Step 6: Spray the Topcoat With Attention to Flex Zones
Once primed, apply your topcoat. For acrylic tubs and shower surrounds, most pros want strong:
- Chemical resistance
- Moisture resistance
- Gloss retention
- Stain resistance
This is why a premium iso-free 2K refinishing system like Zenix is ideal for tubs and showers. It resists bathroom cleaners, water exposure, and temperature swings better than 1K consumer-grade coatings.
Spray technique matters to avoid:
- Orange peel
- Dry spray
- Sags
- Runs
Final glaze should look factory, not textured.
Step 7: Cure, Inspect, and Educate Your Customer
After spraying:
- Allow proper cure time before handling
- Avoid tape or masking on partially cured coatings
- Document care and cleaning instructions
Acrylic refinishing warranty claims often trace back to:
- Abrasive cleaners
- Bath mats with suction cups
- Drain cleaner exposure
- Razor scraping or tool impacts
Your post-install sheet protects you AND the customer.
Troubleshooting Acrylic Refinishing Issues
Peeling or Delamination
Causes:
- Insufficient sanding
- Silicone contamination
- No primer or wrong primer
- Excessive flex in floor pan
Blistering
Causes:
- Moisture trapped behind caulk lines
- Water under floor pan
- Too thick primer or topcoat
Fisheyes
Causes:
- Body oils
- Silicone
- Conditioner and shampoo residue
Orange Peel or Texture
Causes:
- Spraying too dry
- Low temp or high humidity
- Gun distance errors
- Under-reduced coating
FAQ Section
How Do I Properly Prepare an Acrylic Surface for Refinishing?
Professional refinishers often encounter acrylic showers and tubs in modern homes and apartments, and prepping them correctly is essential to avoid adhesion failures, bubbling, or delamination. These surfaces are non-porous, flexible, and often factory-coated, which raises unique prep challenges.
What’s the best way to prep an acrylic tub before spraying?
Clean, degrease, remove silicone, sand with 220–320 grit, wipe down, prime, and then topcoat. Do not acid-etch acrylic.
Is sanding enough to bond to acrylic, or do I need to etch too?
Do I need to remove the factory coating on acrylic tubs first?
No — you do not strip factory acrylic, but you must mechanically profile it through sanding. Only strip previous refinishing coatings using a product like Zen-Strip if present.
Can I use acid etch on acrylic, or will it damage the surface?
Do not use acid etch on acrylic. It can cause haze, surface degradation, and substrate damage.
What Grit Sandpaper Should I Use on Acrylic?
What grit works best to scuff an acrylic tub for coating adhesion?
220–320 grit is ideal. Coarser grits risk gouging or cutting through the gel coat.
Should I dry sand or wet sand an acrylic shower surround?
Dry sanding provides better control and reveals surface defects. Wet sanding can work but introduces water into crevices that may delay priming.
What Cleaners or Degreasers Are Safe for Acrylic?
What’s the safest cleaner to use on acrylic before refinishing?
Water-based degreasers designed for bathroom residue are ideal. Avoid solvents that melt or haze acrylic.
Will acetone or lacquer thinner melt acrylic?
They can soften or distort the surface. Avoid lacquer thinner, acetone, MEK, or strong reducers.
Can I use isopropyl alcohol or should I use a water-based degreaser?
Isopropyl alcohol can be used lightly as a final wipe, but primary cleaning should be done with water-based degreasers.
What Primers or Bonding Agents Should I Use on Acrylic?
What bonding primer works best on acrylic tubs?
Use an epoxy bonding primer designed for non-porous surfaces, such as
Prime-X.
Do I need to prime after sanding an acrylic shower?
Yes. Sanding alone does not provide long-term adhesion. Always prime before coatings.
Is epoxy primer compatible with acrylic surfaces?
Yes. Epoxy primers perform well on acrylic due to their chemical adhesion and flexibility.
Can I Heat the Surface to Help Dry or Cure the Primer/Coating?
Is it safe to use a heat gun or infrared light on acrylic?
Use caution. Excess heat can warp acrylic. Low, indirect airflow is safer.
Will heating the acrylic speed up cure time or cause warping?
It may speed curing but risks deformation. Avoid exceeding ambient temps by more than 10–15°F.
How Do I Spot the Difference Between Acrylic and Fiberglass?
Is this tub acrylic or fiberglass—and does it matter for prep?
Yes — it matters. Acrylic requires sanding only, while fiberglass allows more aggressive profiling.
Can I use the same process for both fiberglass and acrylic tubs?
No. Fiberglass may allow more aggressive sanding or profiling, while acrylic needs gentler mechanical abrasion.
What Causes Peeling or Blistering After Refinishing Acrylic?
Why is my coating peeling off the acrylic surface?
Likely from poor sanding, silicone residue, or skipping primer.
What causes bubbling or fish eyes on refinished acrylic tubs?
Silicone contamination, moisture under caulk lines, or shampoo/conditioner oils.


