Seamless Surface Leveling for Tub & Tile Repair Jobs: How to Avoid Pooling, Buildup and Uneven Coatings
What causes waves or ripples in a refinished bathtub surface?
How smooth should a repair be before applying primer and topcoat?
What's the best way to feather a repair into the surrounding surface?
Ventilation & Containment Systems
What gun cleaning solutions protect seals?
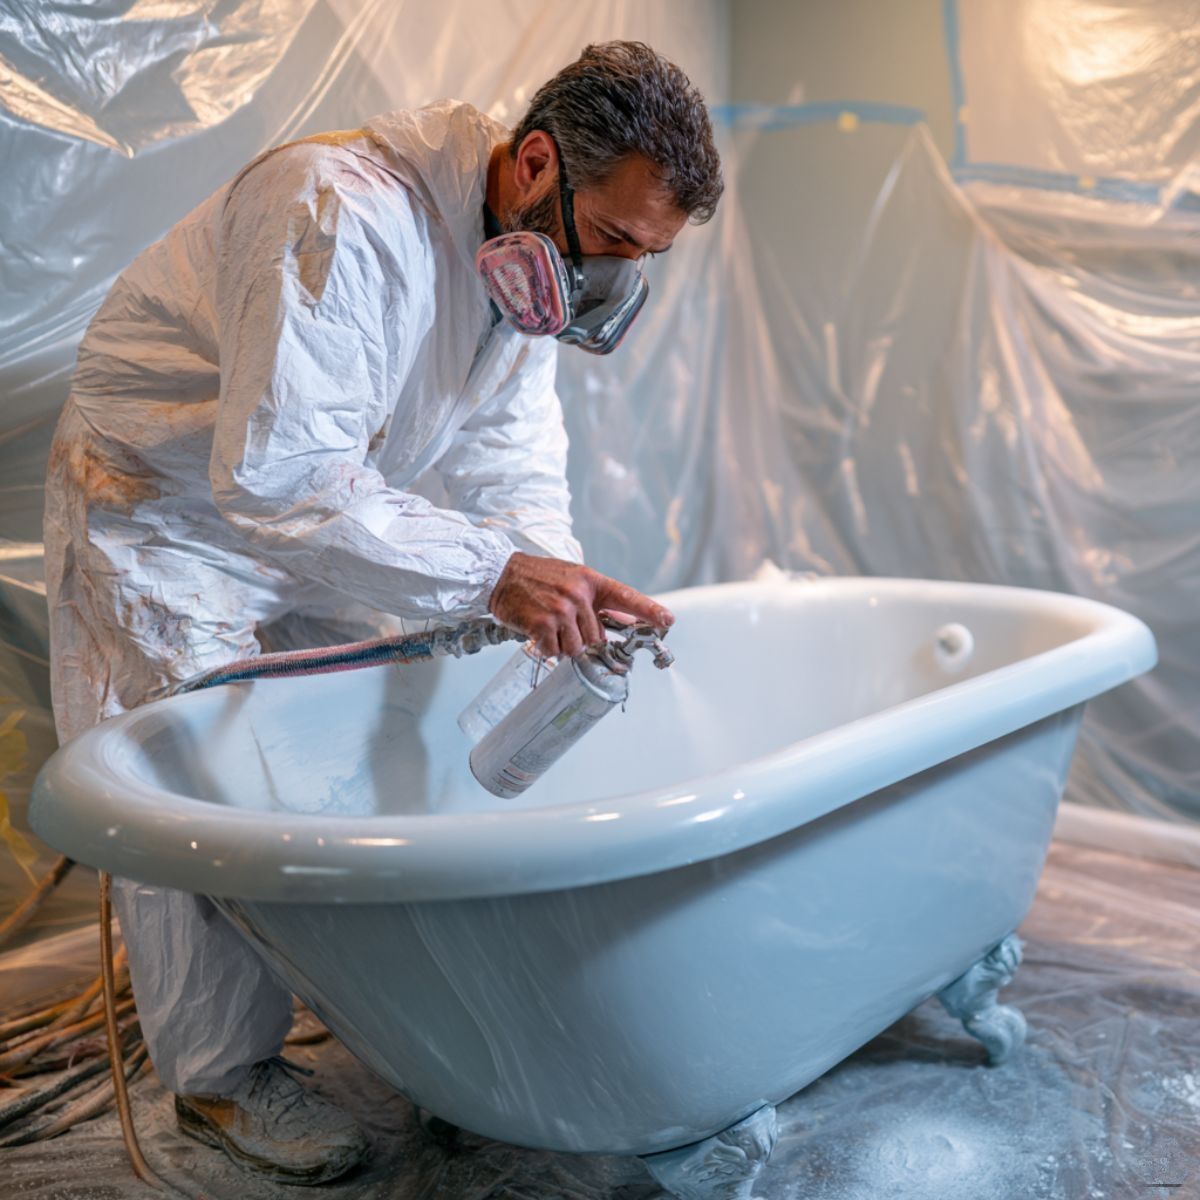
Professional HVLP spray systems with appropriate nozzle sizes can atomize thicker refinishing coatings effectively.
How do I prevent coating buildup in tight corners and radius areas?
Not all cleaning solutions are safe for spray gun components.
Choose cleaning solutions that:
- Do not degrade seals
- Do not corrode internal passages
- Remove coating residue effectively
- Use nylon brushes and Zen-Strip Liquid for monthly thorough cleanings.
Regular maintenance prevents costly equipment replacement.
Can excessive sanding create low spots that show through the coating?
Yes. Power sanding without a proper backing pad, sanding with coarse grit on fiberglass or acrylic, or concentrating manual sanding pressure in a small area can remove more substrate material in one area than another, creating a low spot that reads through the finish. Using a sanding block that distributes pressure over a larger area, working through a proper grit sequence, and checking with raking light after sanding prevents most sanding-induced low spots. When they do occur, they require filling — the coating applied over a low spot simply follows the depression rather than bridging across it.
How do I check a bathtub or tile surface for levelness before coating?
A smooth finish means the coating surface itself has no texture — no orange peel, no dry spray, no contamination. A properly leveled finish means the coating has been applied at consistent thickness across the entire surface so that the gloss and appearance are uniform everywhere, not just where individual areas were applied correctly. A surface can be locally smooth but globally unleveled — different sections read at different gloss levels because the film build varies. The goal is both: smooth coating texture and uniform film thickness across the entire fixture.
Can surface imperfections be fixed after the topcoat is applied?
Many can, though the process is more involved than catching them earlier. Minor imperfections — slight gloss variation, small texture differences, shallow repair edges — can be addressed with wet sanding at 800 to 1500 grit followed by machine polishing to restore gloss. Significant imperfections — visible repair boundaries, heavy coating buildup, sanding waves — require wet sanding back to the level where the defect lives, then recoating. The deeper the defect in the coating system, the more of the system you need to remove and replace to fix it cleanly.
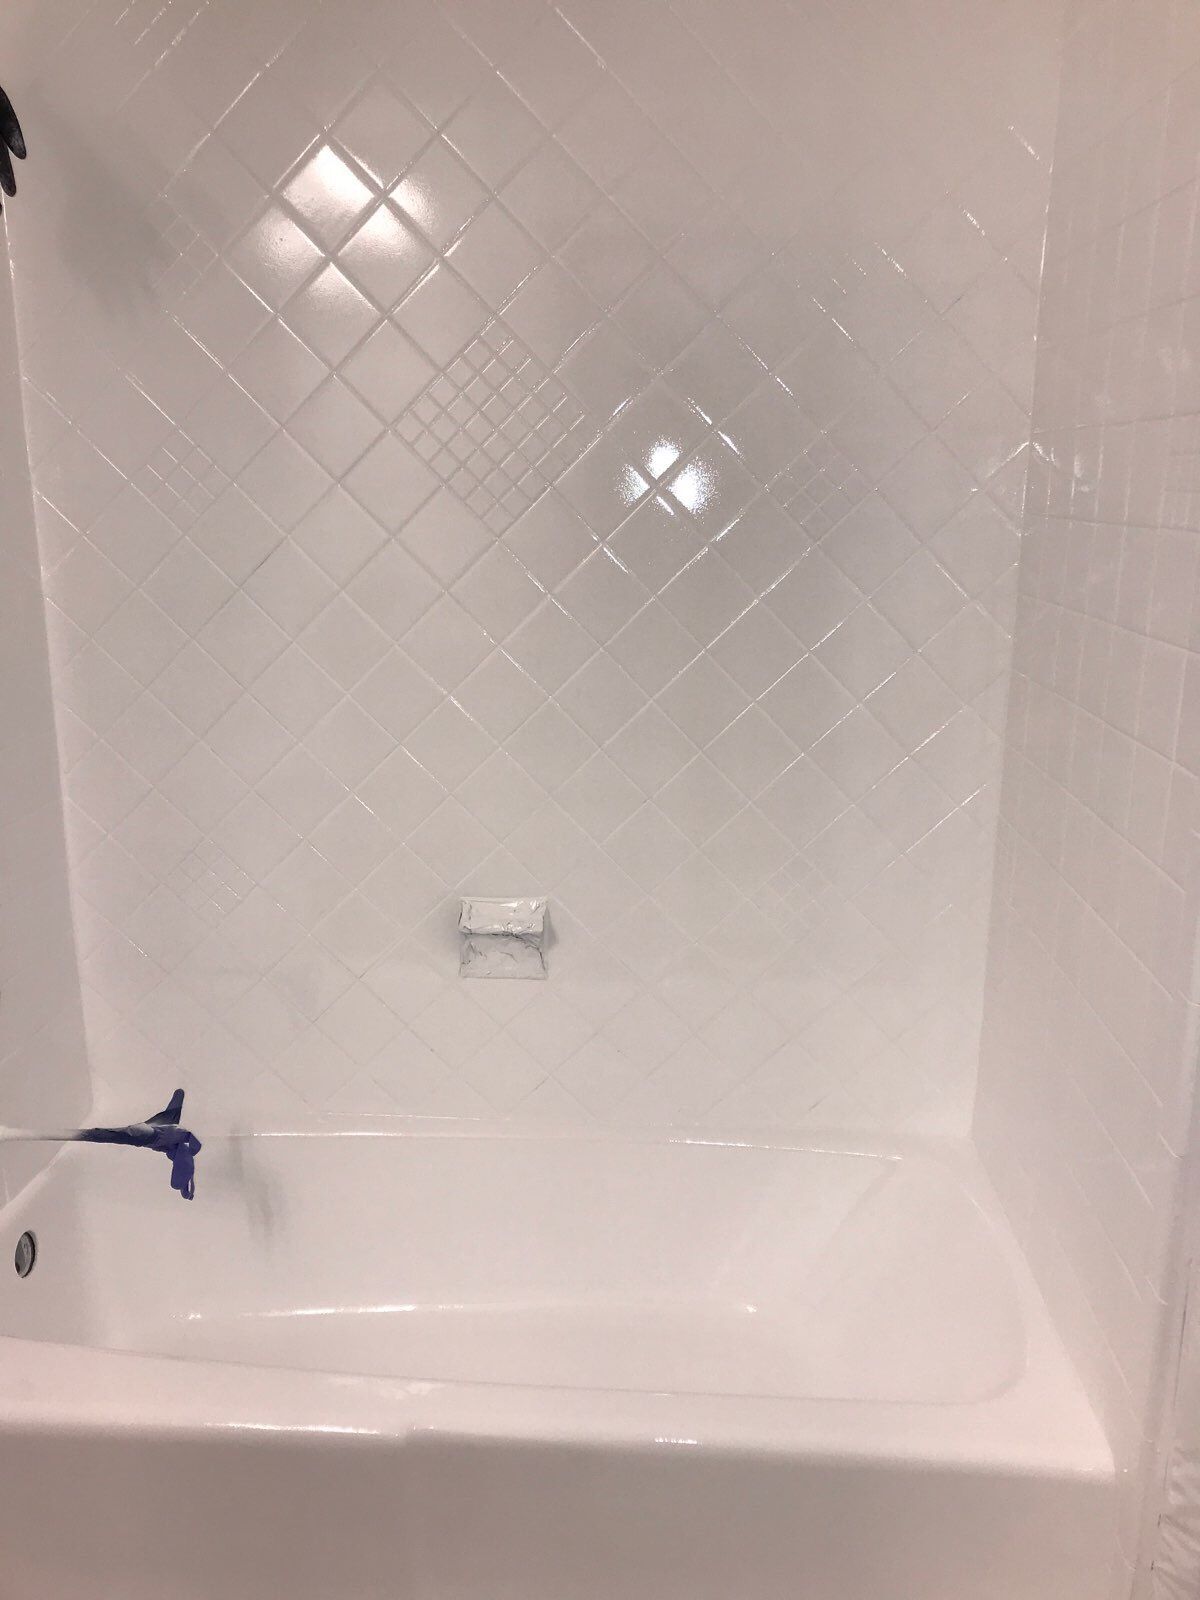
There's a version of a refinishing job that looks perfect in the spray stage and reveals problems the moment the tape comes off. Waves that weren't visible on the wet surface. A drain area where the coating pooled thick and read differently than the rest of the tub. A repaired chip that telegraphed straight through two coats of primer and topcoat like it was never touched. A corner where the coating built up and now reads as a ridge in the finished gloss.
These aren't random outcomes. They come from identifiable causes — surface prep that was close but not quite right, spray technique that didn't account for the geometry of the fixture, or a repair that was declared done before it actually was. Surface leveling is the discipline that prevents all of them, and it's the area where experienced refinishers separate themselves from contractors who produce inconsistent results on jobs that look straightforward.
This guide covers the full picture: why surface leveling matters in tub and tile refinishing, how to identify problems before they become finish defects, the common causes of pooling and uneven coating, and how to recover when something goes wrong after the topcoat is on.
What Surface Leveling Actually Means in Refinishing
Surface leveling in refinishing work isn't the same as making a surface geometrically flat. Bathtubs have intentional slopes toward the drain. Tile installations have grout lines. Countertops have edges and profiles. Shower surrounds have curves and inside corners. None of these are supposed to be flat — they're supposed to be smooth and uniform in the coating that's applied over them.
What leveling means in this context is that the coating film is applied at consistent thickness across all of those surfaces, and that the substrate beneath the coating is free of repair ridges, sanding waves, high spots, and transitions between materials that will read through the finish. A "leveled" surface in refinishing has two components: a properly prepared substrate with no variations in profile that shouldn't be there, and a coating applied with technique that produces consistent film build across every area of the surface — the flat sections, the curves, the corners, and the transitions.
When either component is wrong, the finish tells you. It doesn't hide anything.
Why Surface Leveling Is More Difficult on Tubs and Tile Than It Looks
The geometry of bathroom fixtures creates leveling challenges that flat surfaces don't present. Understanding these challenges is the first step to managing them.
Compound curves. Most fiberglass and acrylic tub units have curved interior profiles — the floor curves up to the walls, the walls curve at the corners, and the deck has its own transitions. When you spray over compound curves, the gun-to-surface distance varies unless you actively manage it. Areas where the gun gets closer receive more material; areas where it moves further away receive less. Over a flat wall you don't notice this much. Over a compound curve, inconsistent distance creates visible variations in film thickness and gloss.
Inside corners. Inside corners — where the floor meets the wall, where adjacent tile walls meet — are areas where coating naturally wants to build. Two spray passes converge in a corner from different angles, and the material from both deposits in the same small area. The result is heavier film build in corners than on the surrounding flat surfaces. In gloss topcoats, this reads as a difference in sheen that draws the eye right to the corner.
Drain and overflow areas. The area around a drain slopes toward a low point. Coating applied to that sloped surface flows with gravity toward the drain before it sets. More material in the spray plus gravity-driven flow creates pooling — a thick, potentially sagging accumulation of coating around the drain that looks different from the surrounding area and can take significantly longer to cure.
Grout lines in tile refinishing. Tile surfaces have regular profile variations — the tile face, the grout line, the edge where one transitions to the other. Coating applied to tile fills the grout lines and builds differently on the grout recesses than on the tile faces. If the spray passes aren't controlled, you can end up with heavy coating in grout lines and lighter coverage on the tile faces, or vice versa — either of which creates visual texture that shouldn't be there.
Repair areas. Any area where a chip, scratch, or crack has been filled and sanded represents a transition between the original surface and the repair material. These transitions are invisible when the repair is done right and glaringly obvious when it isn't. Even a repair that feels smooth under a fingertip can have enough of a profile variation to read through two coats of primer and topcoat.
Reading a Surface Before You Spray: The Skills That Prevent Problems
The best time to find a leveling problem is before primer goes on, not after the topcoat is done. Here's how experienced refinishers evaluate a surface before committing coating to it.
Raking Light Inspection
Raking light — a single light source positioned at a low angle to the surface — is the most effective tool for seeing surface profile variations that are invisible under normal overhead lighting. Position a work light at one end of the tub or tile surface and look down the length of the surface at the angle the light grazes it. Any raised area, depression, ridge, or wave in the substrate casts a shadow or catches light differently than the surrounding flat surface. This is how you find the repair that feels smooth but has a raised edge, the sanding wave you created going too aggressive with coarse grit, or the transition between the original surface and filled area that you'd miss entirely under overhead light.
Do raking light inspection after the surface is clean and prepped, before primer. Do it again after the primer, because the primer reveals surface variations that were invisible on bare substrate. Two rounds of raking light — one after prep, one after primer — catch most of the issues that would otherwise show up in the topcoat.
The Fingertip Test
Run the back of a finger lightly across the surface — the back of the finger is more sensitive to surface variations than the fingertip. You're feeling for transitions: raised repair edges, ridges where sanding stopped, abrupt changes from the repaired area to the original surface. A properly leveled repair surface should feel continuous with the surrounding substrate — no detectable edge, no ridge, no depression.
Shadow Checking on Tile
On tile walls, look at the surface from a low angle with the room light on. Properly prepped tile should show consistent light reflection across the tile faces. Areas where the coating will pool — grout lines, corners, the bottom edge where the tile meets the tub — become visible when you look at the surface from the angle that reveals relief rather than looking straight at it.
Common Causes of Pooling, Buildup, and Uneven Coating
Too Much Material in One Pass
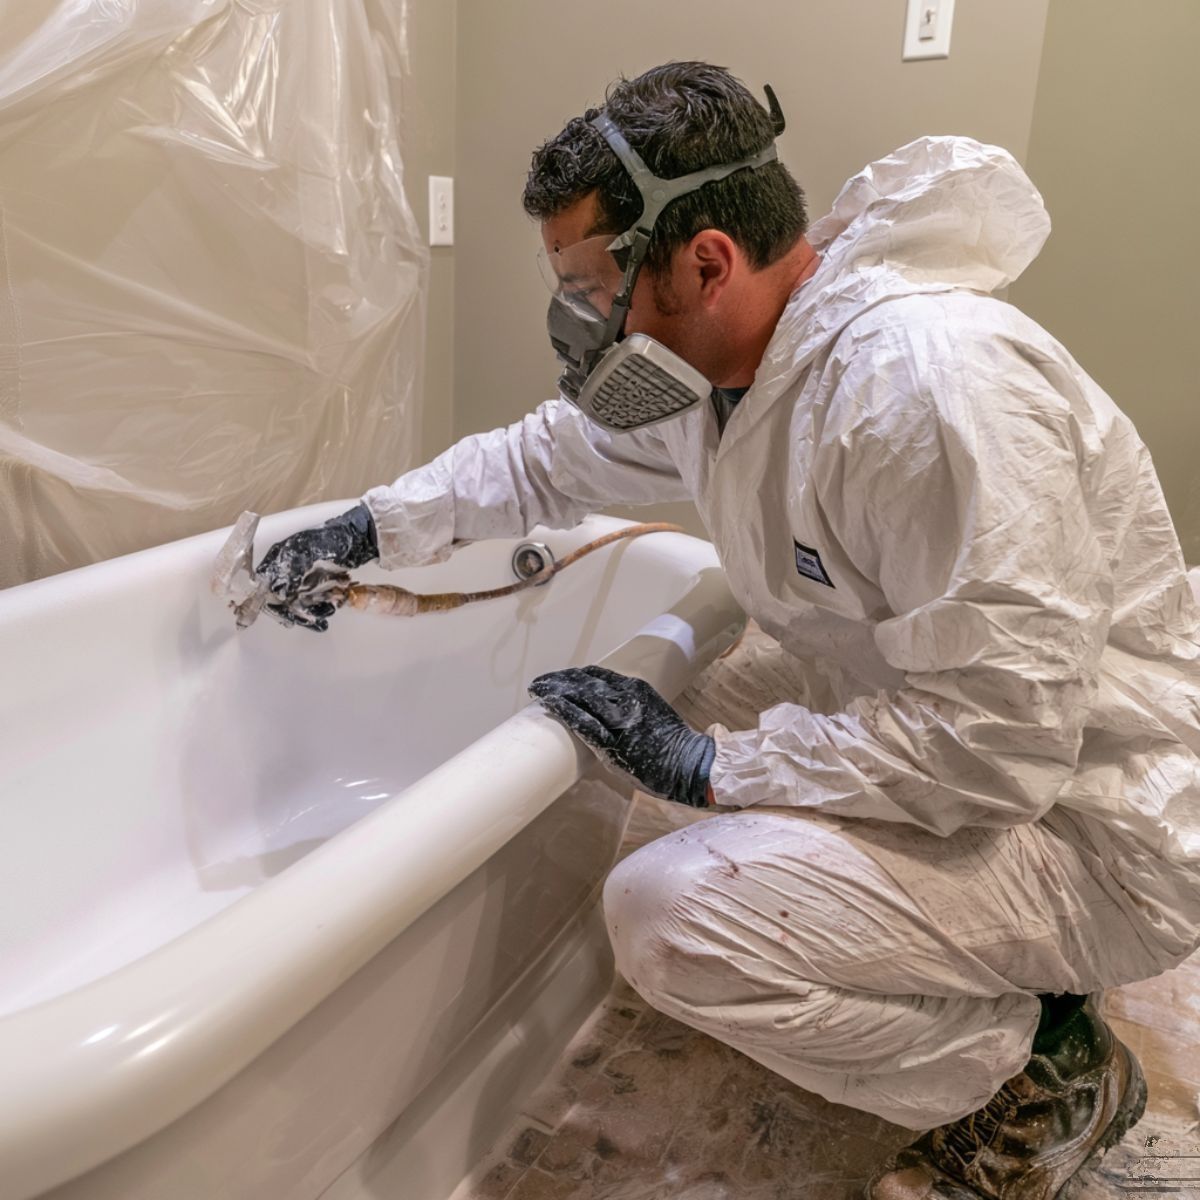
The most straightforward cause of coating buildup and pooling is applying too much material at once. Refinishing topcoats need to be applied in controlled passes that build film in multiple layers — not loaded onto the surface in one heavy application that has too much material to level properly before it starts to set. A pass that's too slow, too close to the surface, or done with fluid pressure too high deposits more material than the surface can level out, and that excess material flows to wherever gravity takes it — typically to the low points, the drain, and the inside corners.
Inconsistent Gun-to-Surface Distance
As noted above, the compound curves of tub and shower geometry create situations where gun-to-surface distance varies if you're not actively compensating. On a flat tile wall, you can hold the gun at a consistent distance through a pass without much effort. On the curved interior of a fiberglass tub, maintaining consistent distance through the curve requires moving your wrist and elbow as the surface curves away — not just moving the gun laterally. Contractors who spray curves the same way they spray flat walls will produce uneven film build across the curved areas.
Corner Convergence
Two spray passes converging in a corner from perpendicular angles deposit material from both passes in the same area. If you spray the floor of a tub and then spray the adjacent wall without adjusting for the material already deposited in the corner from the floor pass, the corner gets double the material. The solution is to reduce the fan pattern and pressure slightly when working into corners, and to be aware of how adjacent passes interact in confined geometry.
Insufficient Dry Time Between Coats
Applying a subsequent coat before the previous one has reached the appropriate dry time compounds film build in areas that were already slightly heavier. The second coat finds pooled material from the first, adds to it, and the result is a noticeably thicker area that takes longer to cure, may sag or run, and will look different from the surrounding surface when dry. For a comprehensive guide on recoat windows and dry time for each Zen-Tek product, see Zen-Tek's
dry times guide on the blog — those windows exist specifically to prevent compounding problems across successive coats.
Repair Transitions That Weren't Fully Leveled
A repair that reads as smooth under your fingertip at eye level can still have a detectable profile variation — a slight rise at the edge where the repair material meets the original surface, or a very slight depression in the center of the repair where the filler shrank slightly during cure. Either of these reads through primer and topcoat. The repair edge is the specific area to focus on during leveling prep — that's where the transition needs to be feathered to nothing.
Sanding-Induced Waves and Low Spots
Aggressive sanding with coarse paper, particularly with power tools or with hand pressure concentrated in a small area, can create low spots and waves in fiberglass and acrylic that weren't there before you started. These are most common when contractors use too coarse a grit for the substrate — 80 or 120 grit on fiberglass creates a texture that requires additional filling rather than simply preparing a surface for primer. Working through the proper grit sequence (starting at 220 for most fiberglass work, finishing at 400) and using a sanding block that distributes pressure over a larger area prevents most sanding-induced surface variations.
The Repair Leveling Process: Step by Step
For repair jobs specifically — chips, scratches, and surface damage that need to be filled before coating — the leveling sequence is the difference between a professional result and a job that comes back as a callback.
1. Fill in thin layers. Repair compound applied in thick layers takes longer to cure, shrinks more during cure, and is harder to level than compound applied in multiple thin passes. Build the repair in layers, allowing each to cure before adding the next. The goal at this stage is to get the repair material slightly above the surrounding surface level — you'll bring it down with sanding, not try to land perfectly level on the fill passes.
2. Block sand, don't spot sand. Use a sanding block that extends beyond the repair area onto the surrounding substrate. This distributes the sanding across both the repair material and the adjacent surface, creating a smooth transition rather than a distinct edge. Spot sanding — working only on the repair itself — creates a depression in the repair relative to the surrounding surface that reads through the finish.
3. Work through the grit sequence. Start at 220 to remove bulk material, move to 320 to refine, and finish at 400 before priming. Jumping from a coarse grit to the final grit in one step leaves sanding scratches that read through primer on smooth surfaces. Each grit removes the scratches from the previous grit while creating a finer scratch pattern.
4. Check with raking light after each grit. Don't rely on feel alone. After each sanding stage, do a raking light check to confirm the repair is leveling correctly and that you haven't created new waves or low spots.
5. Feather the edges. The edge of the repair — where the repair material meets the original substrate — needs to be feathered to zero. No abrupt transition, no detectable ridge in any direction. Raking light inspection shows you whether the feather is working; if you can still see a line at the repair boundary under raking light, keep working the edge.
For in-depth coverage of specific repair scenarios — chip depth, size, and how they affect the repair approach — see Zen-Tek's post on
tub and tile chip repair techniques.
Surface Leveling and Primer: What Primer Can and Can't Do
A common misconception is that primer will fill in minor surface variations and produce a level substrate for the topcoat. Primer can fill very fine sanding scratches and create a uniform surface for the topcoat to bond to. What it can't do is bridge across meaningful profile variations — repair edges, sanding waves, transitions between materials — without reading through the topcoat.
Prime-X, Zen-Tek's high-build single-coat epoxy primer, has better filling capability than most primers in its category — it builds a substantial film that contributes to surface uniformity. But "high build" doesn't mean "skim coat." Even Prime-X applied over a repair transition that wasn't properly feathered will show that transition in the finished topcoat. The primer job looks level; the topcoat reveals what's underneath.
For water-based applications where client requirements call for a low-VOC primer system, WTR-Prime provides the same function — strong adhesion, uniform film, and a sealed substrate for the topcoat — without the solvent odor. The leveling principle applies equally: WTR-Prime can refine a well-prepared surface but can't compensate for inadequate mechanical leveling of the substrate.
The practical takeaway: do your leveling work at the substrate stage, verify it under raking light, prime, check again under raking light after primer, and address anything that reads under the primer coat before applying topcoat. It takes more time in the middle of the job but eliminates callbacks and redos on the back end.
Spray Technique for Even Film Build
The mechanical preparation of the substrate is half the leveling equation. The spray application is the other half. A perfectly prepared surface can still produce an uneven result if the coating is applied with technique that deposits material inconsistently.
Establish a Consistent Pass Speed and Distance
Before starting the topcoat, decide on your gun-to-surface distance and pass speed and commit to them. A consistent 8 to 10 inches from the surface for most topcoat applications. A pass speed that's brisk enough to prevent loading but slow enough to lay down adequate film build. Practice the pass on a test panel if you're working with a new product or a gun setup you haven't used recently. Inconsistencies in pass speed — slowing down at the end of a pass, hesitating in a corner — are visible in the finished coat.
Trigger Discipline
Start the gun stroke before the surface edge and end it after. Triggering on and off at the surface edge deposits heavier material at the start and end of each pass, which is exactly where you don't want heavier material — at the edges, corners, and boundaries of the spray zone. Keep the gun moving through the trigger pull.
Reduce Pressure and Fan for Corners and Tight Areas
Inside corners and tight geometry need a narrower fan pattern and slightly reduced fluid pressure compared to open flat surfaces. Approach these areas as separate zones from the flat passes — reduce your settings, apply a controlled pass into the corner, then return to standard settings for the adjacent flat surface. Don't try to spray a wide fan pattern into a tight corner and expect the material to distribute evenly.
Work the Curved Geometry
On curved fiberglass tubs, the spray arc needs to follow the curve — not just move laterally across it. Think of it as keeping the gun perpendicular to the surface at every point through the pass rather than keeping the gun in a fixed position and sweeping an arc. This keeps the gun-to-surface distance consistent as the geometry changes beneath you.
Multiple Thin Coats Over Fewer Heavy Coats
Two or three thin passes that build to the correct film thickness produce a better leveled, better looking finish than one heavy pass that exceeds what the coating can self-level before it starts to set. This is true on flat surfaces; it's especially true on the complex geometry of tub and shower fixtures where one heavy pass deposits very different amounts of material in different areas of the surface.
For complete equipment setup guidance — gun type selection, tip sizing, fluid and air pressure recommendations — the
Professional Refinisher's Equipment Cheatsheet on the Zen-Tek blog covers the full range of variables that affect how coating lays down and levels.
Choosing Topcoats That Support Good Leveling
Coating formulation matters for leveling. A topcoat with good self-leveling characteristics smooths out minor application variations as it cures — small differences in film thickness even out as the coating flows. A topcoat that flashes fast or has poor flow characteristics locks in application inconsistencies before the film has time to level.
Synergy, Zen-Tek's polyurethane acrylic topcoat, and Zenix, the iso-free 2K topcoat, are both formulated with the self-leveling characteristics that professional refinishing work demands. They flow properly over the substrate when applied correctly, giving the film time to level before setting. For water-based applications, WTR-Tek delivers comparable leveling performance — it's the best-looking water-based topcoat in its category, producing a smoother, glossier result than other water-based systems specifically because of how the formula flows and levels on the substrate.
The self-leveling window in any topcoat depends on application conditions — temperature, humidity, and airflow all affect how long the wet film has to move before it sets. Working in the recommended temperature and humidity range gives the coating the time it needs to level properly. Working in conditions outside that range — particularly in hot, dry conditions where solvents flash faster — compresses the leveling window and makes it harder to achieve a smooth result regardless of technique. Zen-Tek's
orange peel post covers exactly this dynamic — how environmental conditions interact with coating flow to produce surface texture — and is worth reading alongside this guide.
Fixing Leveling Problems After the Topcoat
The best version of this scenario is catching leveling problems before the topcoat. When they do appear in the finished coat, recovery options depend on what the problem is and how severe.
Pooling around drains or in corners: If the pooled material is still wet or in early cure, careful redistribution with a brush or foam roller can move excess material to adjacent areas before the coating sets. This is a narrow window — once the coating starts to set, touching it creates worse problems than the pooling itself. If the pool has already cured, wet sanding at 400 grit brings the high area back to level, followed by polishing to restore gloss. Significant runs or sags may require wet sanding and a final topcoat pass over the affected area.
Repair telegraphing through topcoat: If a repair is visible through the topcoat as a raised area, depression, or edge, the only correct fix is to wet sand the area level and recoat. The topcoat can be wet sanded carefully to reduce the visible transition, but if the underlying profile is still there, it will remain visible at some lighting angles regardless of how smooth the topcoat surface is.
Uneven gloss or sheen: Gloss variation across the surface often traces back to inconsistent film thickness — thicker areas tend to read glossier than thinner areas in solvent-borne topcoats. Wet sanding the entire surface at 800 to 1000 grit followed by polishing with a machine polisher produces a more uniform sheen by reducing the gloss of the heavier areas and blending them toward the lighter ones. This works for marginal variations; significant film thickness differences require sanding and a recoat pass.
Sanding-induced waves and low spots: These require filling — either with additional repair compound on bare substrate or with additional topcoat passes over cured coating — followed by sanding level again. This is why preventing them in prep is so much better than fixing them afterward.
Frequently Asked Questions About Surface Leveling in Tub and Tile Refinishing
Why does my bathtub refinishing look smooth before spraying but uneven after the topcoat?
Topcoat reveals surface variations that are invisible on a bare substrate or even on primer. The gloss of a topcoat acts like a mirror — it reflects light uniformly from a truly flat surface, and reflects it inconsistently from surfaces that have subtle waves, ridges, or transitions. What felt smooth under your fingertip and looked acceptable under normal lighting shows up clearly in the high-gloss reflection of the finished coat. The solution is raking light inspection before primer and again after primer, which catches these variations before the topcoat commits them to the finished surface.
How do professional refinishers identify high spots and low spots before coating?
Raking light is the primary diagnostic tool. A single work light positioned at a low angle to the surface — grazing across it rather than illuminating it from above — creates shadows and highlights at any surface variation. High spots catch the light; low spots fall into shadow. This makes repair edges, sanding waves, and subtle transitions visible that are completely invisible under overhead lighting. The fingertip test on the back of the hand supplements raking light for tactile confirmation of transitions that might be at the edge of visual detectability.
What causes waves or ripples in a refinished bathtub surface?
Sanding waves are the most common cause — aggressive sanding with coarse grit paper, power sanding without a backing pad that distributes pressure evenly, or concentrating sanding pressure in a small area. These create a wave pattern in the substrate that reads through primer and topcoat as a ripple in the finished surface. They can also be caused by applying compound or filler in passes that leave ridges which weren't fully leveled before priming. The fix after the fact is wet sanding the entire affected area at 400 grit to bring the high points of the waves down to the level of the low points, then recoating.
How smooth should a repair be before applying primer and topcoat?
The repair should feel completely continuous with the surrounding substrate — no detectable edge, ridge, or depression in any direction across the repair boundary. Under raking light, the repair area should show no different shadow or highlight pattern than the surrounding surface. This is the practical test: if you can see the repair boundary under raking light at a low angle, it needs more feathering before primer goes on. The finish coat will reveal whatever the raking light shows, and typically more.
What's the best way to feather a repair into the surrounding surface?
Use a sanding block that extends onto the original substrate on all sides of the repair, not just the repair material itself. Block sanding distributes the cutting across both the repair and the adjacent surface simultaneously, creating a gradual transition rather than an abrupt edge. Work in circular or cross-hatch patterns with the block, not just back-and-forth along the axis of the repair. Finish the feather at 400 grit and verify under raking light before priming.
Why do repaired areas sometimes show through the final finish?
The repair boundary is still there as a profile variation in the substrate — the repair material and the original surface create a transition that wasn't fully feathered to zero. The topcoat follows this transition, creating a visible edge or shadow in the finished gloss. In some cases, repair compound that shrank slightly during cure creates a subtle depression at the repair center that reads through even when the edges were feathered correctly. This is why multiple thin fill layers (which shrink less than one thick layer) and raking light verification after each sanding stage are both important.
Why does bathtub coating pool around drains, overflows, or corners?
Two contributing factors: gravity and spray convergence. The drain area is the low point of the tub, and wet coating flows toward it before it sets. Corners receive material from two adjacent spray passes, depositing double the material in the same area. Both are predictable — the solution is to adjust technique before the problem occurs rather than trying to fix it after. Near drains, apply lighter passes and check for pooling between coats before adding more material. In corners, reduce your fan pattern and pressure and treat the corner as a separate spray zone from the adjacent flat surfaces.
How do I prevent coating buildup in tight corners and radius areas?
Reduce the fan pattern width and fluid pressure when working into corners and tight inside radii. Apply the corner first as its own controlled pass, then move to the adjacent flat surfaces. Don't try to spray a full-width fan pattern into a corner — the material from the edges of the fan hits the perpendicular surface and adds to the corner deposit. Think of corners as a specific sub-job within the larger spray: smaller fan, less pressure, deliberate controlled passes, awareness of how adjacent surfaces interact in that area.
Why does one section of a tub look thicker or glossier than the rest?
Inconsistent film build. Thicker areas of a solvent-borne topcoat typically read glossier than thinner areas because the surface has more material to level and reflects light more uniformly. The cause is usually a spray pass that slowed down over that section, a gun-to-surface distance that decreased in that area, or a section that received an extra pass because of a pause or overlap in the spray pattern. Wet sanding the heavier area at 800 to 1000 grit and polishing can reduce the variation; significant differences in film thickness require a full sand and recoat.
Can uneven coating thickness cause premature coating failure?
Yes. Areas where coating is significantly thicker than spec take longer to cure and may never reach full crosslink density in cold or humid conditions — the coating chemistry is depth-limited in how far the cure initiates. Thick film buildup in corners and around drains is also associated with solvent entrapment — solvents trapped in a heavy film that hasn't fully cured remain in the coating and can cause adhesion problems or softness over time. Consistent film build within the product's specified range avoids both problems.
How do I fix pooling or excessive film buildup after spraying?
If the coating is still wet: work quickly and carefully to redistribute excess material with a foam roller or brush, moving it from the pooled area toward adjacent surfaces. This is a very narrow window — once the coating starts to set, touching it creates drag marks that are worse than the pool. If the coating has cured: wet sand the affected area at 400 grit to bring it back to the surrounding film level, then polish to restore gloss. If the buildup is significant — heavy sagging or runs — wet sanding may need to go to 220 or 320 to reduce the heavy area before finishing at 400 and polishing.
Can excessive sanding create low spots that show through the coating?
Yes. Power sanding without a proper backing pad, sanding with coarse grit on fiberglass or acrylic, or concentrating manual sanding pressure in a small area can remove more substrate material in one area than another, creating a low spot that reads through the finish. Using a sanding block that distributes pressure over a larger area, working through a proper grit sequence, and checking with raking light after sanding prevents most sanding-induced low spots. When they do occur, they require filling — the coating applied over a low spot simply follows the depression rather than bridging across it.
What's the best lighting for spotting surface imperfections before spraying?
A single portable work light positioned at a low angle to the surface — typically a task light or LED shop light set near floor level and aimed along the length of the tub or tile surface. The goal is raking light that grazes across the surface rather than overhead lighting that illuminates from above. Overhead lighting washes out surface variations; raking light reveals them by creating shadows and highlights at any change in profile. Carry a portable LED work light in your kit specifically for this purpose — natural light and bathroom ceiling fixtures don't provide the directional light needed for effective surface inspection.
How do I check a bathtub or tile surface for levelness before coating?
Raking light inspection is the primary method. After prep, position a work light at a low angle and look down the length of the surface for shadows, highlights, and profile variations. The fingertip test — running the back of a finger lightly across repair areas and transitions — provides tactile confirmation. For large tile walls, look at the surface from a low angle across the room to read the reflection of any light source across the tile faces; any surface variation interrupts the reflection uniformly and becomes visible. After priming, repeat both checks before applying topcoat — primer reveals variations that were invisible on bare substrate.
What's the difference between a smooth finish and a properly leveled finish?
A smooth finish means the coating surface itself has no texture — no orange peel, no dry spray, no contamination. A properly leveled finish means the coating has been applied at consistent thickness across the entire surface so that the gloss and appearance are uniform everywhere, not just where individual areas were applied correctly. A surface can be locally smooth but globally unleveled — different sections read at different gloss levels because the film build varies. The goal is both: smooth coating texture and uniform film thickness across the entire fixture.
How do professional refinishers achieve a perfectly smooth bathtub finish?
The combination of thorough substrate prep (raking light inspection, proper repair leveling, feathered transitions), quality primer (high-build adhesion primer that seals the substrate uniformly), appropriate topcoat selection (self-leveling formulation applied in controlled passes), and correct spray technique (consistent distance and speed, thin passes built in layers, corner and geometry management). Products like Synergy, Zenix, and WTR-Tek from Zen-Tek Coatings are formulated specifically for the self-leveling performance that professional refinishing work requires. The equipment matters too — for a full guide to gun selection and setup, see the Professional Refinisher's Equipment Cheatsheet.
What causes uneven bathtub refinishing results?
The most common causes, roughly in order of frequency: inadequately leveled repairs that telegraph through the finish; inconsistent spray technique that deposits different film thickness in different areas; coating buildup in corners and around low points; insufficient dry time between coats that compounds existing inconsistencies; and substrate contamination that prevents uniform wetting (covered in detail in Zen-Tek's post on fisheyes and coating defects). Most uneven results trace back to one of these causes, and most are preventable with the right prep sequence, technique awareness, and product knowledge.
How do you know when a repair is smooth enough to spray?
The repair should pass three tests: it's undetectable to the fingertip on the back of the hand across the repair boundary in all directions; it shows no visible shadow or highlight variation under raking light at a low angle; and it has been finished at 400 grit consistently across both the repair material and the surrounding substrate. If any of these tests shows the repair boundary, it needs additional feathering before primer. The rule of thumb: if you can find it before primer, the topcoat will find it for you.
Can surface imperfections be fixed after the topcoat is applied?
Many can, though the process is more involved than catching them earlier. Minor imperfections — slight gloss variation, small texture differences, shallow repair edges — can be addressed with wet sanding at 800 to 1500 grit followed by machine polishing to restore gloss. Significant imperfections — visible repair boundaries, heavy coating buildup, sanding waves — require wet sanding back to the level where the defect lives, then recoating. The deeper the defect in the coating system, the more of the system you need to remove and replace to fix it cleanly.
How much coating is too much during bathtub refinishing?
Each product has a specified film build range in the technical data sheet, and staying within that range is the goal. As a practical guideline, a single topcoat pass should lay down enough material to wet the surface uniformly without visible runs or sag when viewed from a low angle during or immediately after application. Coating that starts to sag or run during application is too heavy. Two to three passes of appropriate weight, with proper dry time between them, builds adequate total film thickness without the problems associated with excessive single-pass build.
What is the most common cause of coating failure in bathtub refinishing?
Inadequate surface preparation — particularly contamination that prevented proper adhesion, or a substrate that wasn't correctly profiled before priming. Adhesion failure produces peeling and delamination that typically presents in the first months of service. After adhesion, the next most common cause of failure is coating that was applied too thick in specific areas — around drains, in corners — and never fully cured due to solvent entrapment or insufficient crosslinking in heavy film build. Both are prevented by correct prep sequence and spray technique. For a full picture of how prep quality affects long-term coating performance, Zen-Tek's post on surface prep and coating steps for fiberglass tubs and showers covers the complete prep-to-topcoat sequence in detail.